

How to Install and use Lsyncd on CentOS 7 / RHEL 7 rsync
Lsyncd stands for “Live Syncing Daemon“, as the name suggest lsyncd is used to sync or replicate files & directories locally and remotely after a specific time of interval. It uses rsync & ssh in the backend.
Lsyncd works on Master and Slave architecture where it monitors the directory on the master server, if any changes or modification are done then lsyncd will replicate the same on its slave servers after specific interval of time.
In this article we will discuss how to install and use lsyncd on CentOS 7 & RHEL 7.
Scenario : Suppose want to sync the folder “/var/www/html” from Master server to Slave server
- Master Server’s IP = 192.168.1.14
- Slave Server’s IP = 192.168.1.15
- Directory to be Sync = /var/www/html
First Enable Key based authentication between Master and Slave Server.
Login to Master server & generate the public and Private keys using ssh-keygen command.
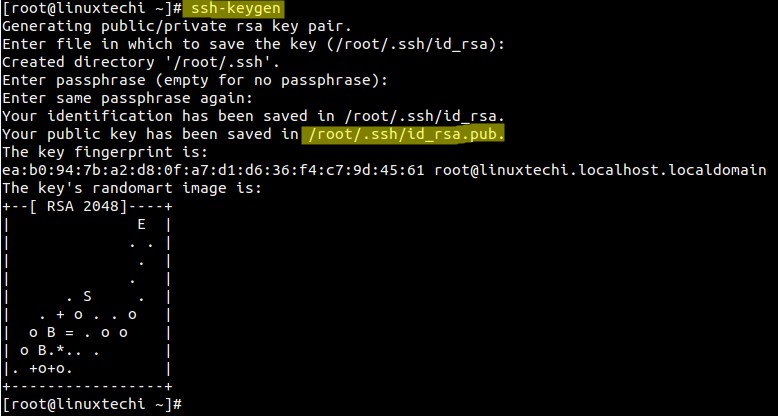
Now Copy the public key using ssh-copy-id command to slave server
[root@linuxtechi ~]# ssh-copy-id -i /root/.ssh/id_rsa.pub root@192.168.1.15
Step:1 Login to Master Server and Install Lsyncd Package
Install the lsyncd dependency packages using below yum command.
[root@linuxtechi ~]# yum install lua lua-devel pkgconfig gcc asciidoc
To install lsyncd package using yum command , first enable the EPEL repo as lsyncd rpm is not available in the default repos.
[root@linuxtechi ~]# rpm -iUvh http://dl.fedoraproject.org/pub/epel/7/x86_64/e/epel-release-7-5.noarch.rpm
[root@linuxtechi ~]# yum install lsyncd
Step:2 Set up Configuration File of Lsyncd
Copy the sample Configuration to /etc/lsyncd.conf
[root@linuxtechi ~]# cp /usr/share/doc/lsyncd-2.1.5/examples/lrsync.lua /etc/lsyncd.conf
Add the following Lines to the config file.
[root@linuxtechi ~]# cat /etc/lsyncd.conf
----
-- User configuration file for lsyncd.
--
-- Simple example for default rsync.
--
settings = {
 logfile = "/var/log/lsyncd.log",
 statusFile = "/var/log/lsyncd.stat",
 statusInterval = 2,
}
sync{
 default.rsync,
 source="/var/www/html",
 target="192.168.1.15:/var/www/html",
 rsync={rsh ="/usr/bin/ssh -l root -i /root/.ssh/id_rsa",}
}
[root@linuxtechi ~]#
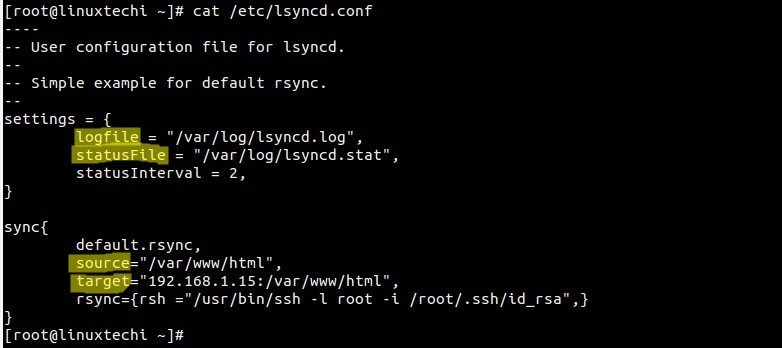
Step:3 Start the Service and enable it at reboot
[root@linuxtechi ~]# systemctl start lsyncd
[root@linuxtechi ~]# systemctl enable lsyncd
ln -s '/usr/lib/systemd/system/lsyncd.service' '/etc/systemd/system/multi-user.target.wants/lsyncd.service'
Step:4 Analyze the Replication and Logs Report.
As we can see that we are using “root” user for syncing data , as per your requirement you can change the user name.
In the log File we can see the status of replication whether the replication is completed or Not.
[root@linuxtechi ~]# tail -10 /var/log/lsyncd.log
Sun Jul 26 12:53:04 2015 Normal: recursive startup rsync: /var/www/html/ -> 192.168.1.15:/var/www/html/
Sun Jul 26 12:53:56 2015 Normal: Startup of "/var/www/html/" finished.
[root@linuxtechi ~]#
Using Stat file we view the lsyncd status Report. Sample Example is shown below
[root@linuxtechi ~]# more /var/log/lsyncd.stat

Lsyncd status report at Sun Jul 26 12:53:58 2015
Sync1 source=/var/www/html/
There are 0 delays
Excluding:
 nothing.

Inotify watching 849 directories
 1: /var/www/html/
 2: /var/www/html/catalog/
 3: /var/www/html/catalog/controller/
 4: /var/www/html/catalog/controller/module/
 5: /var/www/html/catalog/controller/checkout/
 6: /var/www/html/catalog/controller/api/
 7: /var/www/html/catalog/controller/payment/
 8: /var/www/html/catalog/controller/tool/
 9: /var/www/html/catalog/controller/product/
 ---------------------
 848: /var/www/html/system/library/db/
 849: /var/www/html/system/modification/
[root@linuxtechi ~]#
 Subscribe to Article
 Print Article
 Email Article to Friend
 Export to PDF
 Export to MS Word